
Streetwear Photography Poses: How to Not Look Awkward
Practical poses for streetwear photos that look natural, not forced. For Instagram, lookbooks, and anyone who freezes up the second a camera points at them.
Why Streetwear Photos Are Harder Than They Look
You've put together a fit that genuinely slaps. The layers work. The sneakers are clean. The colors coordinate without matching. You pull out your phone, open the camera, and suddenly you're standing like a mannequin that was assembled wrong. Hands at your sides, weight on both feet, face doing something between a smile and a grimace. The outfit looks great in the mirror and terrible in the photo.
This happens because posing is a skill, not an instinct. Nobody is born knowing how to stand naturally in front of a camera. Photographers spend years learning how to direct models into positions that look effortless, and those models spend years learning how to execute them. You're trying to do both roles simultaneously with a phone timer and a wall to lean against.
The good news: the gap between "awkward" and "natural" is smaller than you think. A handful of principles and a few practiced poses are enough to make your fit pics look intentional instead of accidental.
The Fundamentals
Weight Distribution
The single biggest difference between a good photo and an awkward one is how you distribute your weight. Standing with weight evenly on both feet — the "attention" stance — is the default posture for most people in front of a camera. It's also the most unflattering position possible because it makes your body look rigid and symmetrical in a way that reads as tense.
The fix: Shift 70-80% of your weight to one leg. Let the other leg relax. This creates a natural S-curve through your body — one hip slightly higher, one shoulder slightly lower — that photographs as casual and confident. It's the same thing you do naturally when you're standing and talking to a friend. The camera just makes you forget to do it.
Hand Placement
Hands are the second biggest problem. Empty hands hanging at your sides look dead. Hands in both pockets look closed off. Hands clasped in front look formal. The solution is giving your hands something to do — or at least somewhere to be that looks intentional.
Strong hand positions:
- One hand adjusting your hat or collar
- Thumbs hooked in front pockets (not full hands in pockets)
- Holding your phone, a bag, or a drink naturally at your side
- One hand on a belt or waistband
- Arms crossed (but loosely — not defensive, relaxed)
- One hand touching your face or jaw (subtly, not like you're thinking)
Avoid:
- Both hands stuffed fully in pockets (hides the fit)
- Hands behind your back (looks like you're being questioned)
- Pointing at the camera
- Peace signs (unless that's genuinely your personality, in which case go ahead)
Eye Line
Where you look determines the photo's mood more than anything else.
- Direct to camera: Confident, confrontational, editorial. This works for headshot-focused photos and close-ups.
- Off to the side: Candid, unstaged, editorial. The most commonly used angle for streetwear photography. Looking 45 degrees to the left or right suggests the photo caught a moment rather than staged one.
- Down at shoes: Shows the sneakers, reads as thoughtful or introspective. Works well for sneaker-focused content.
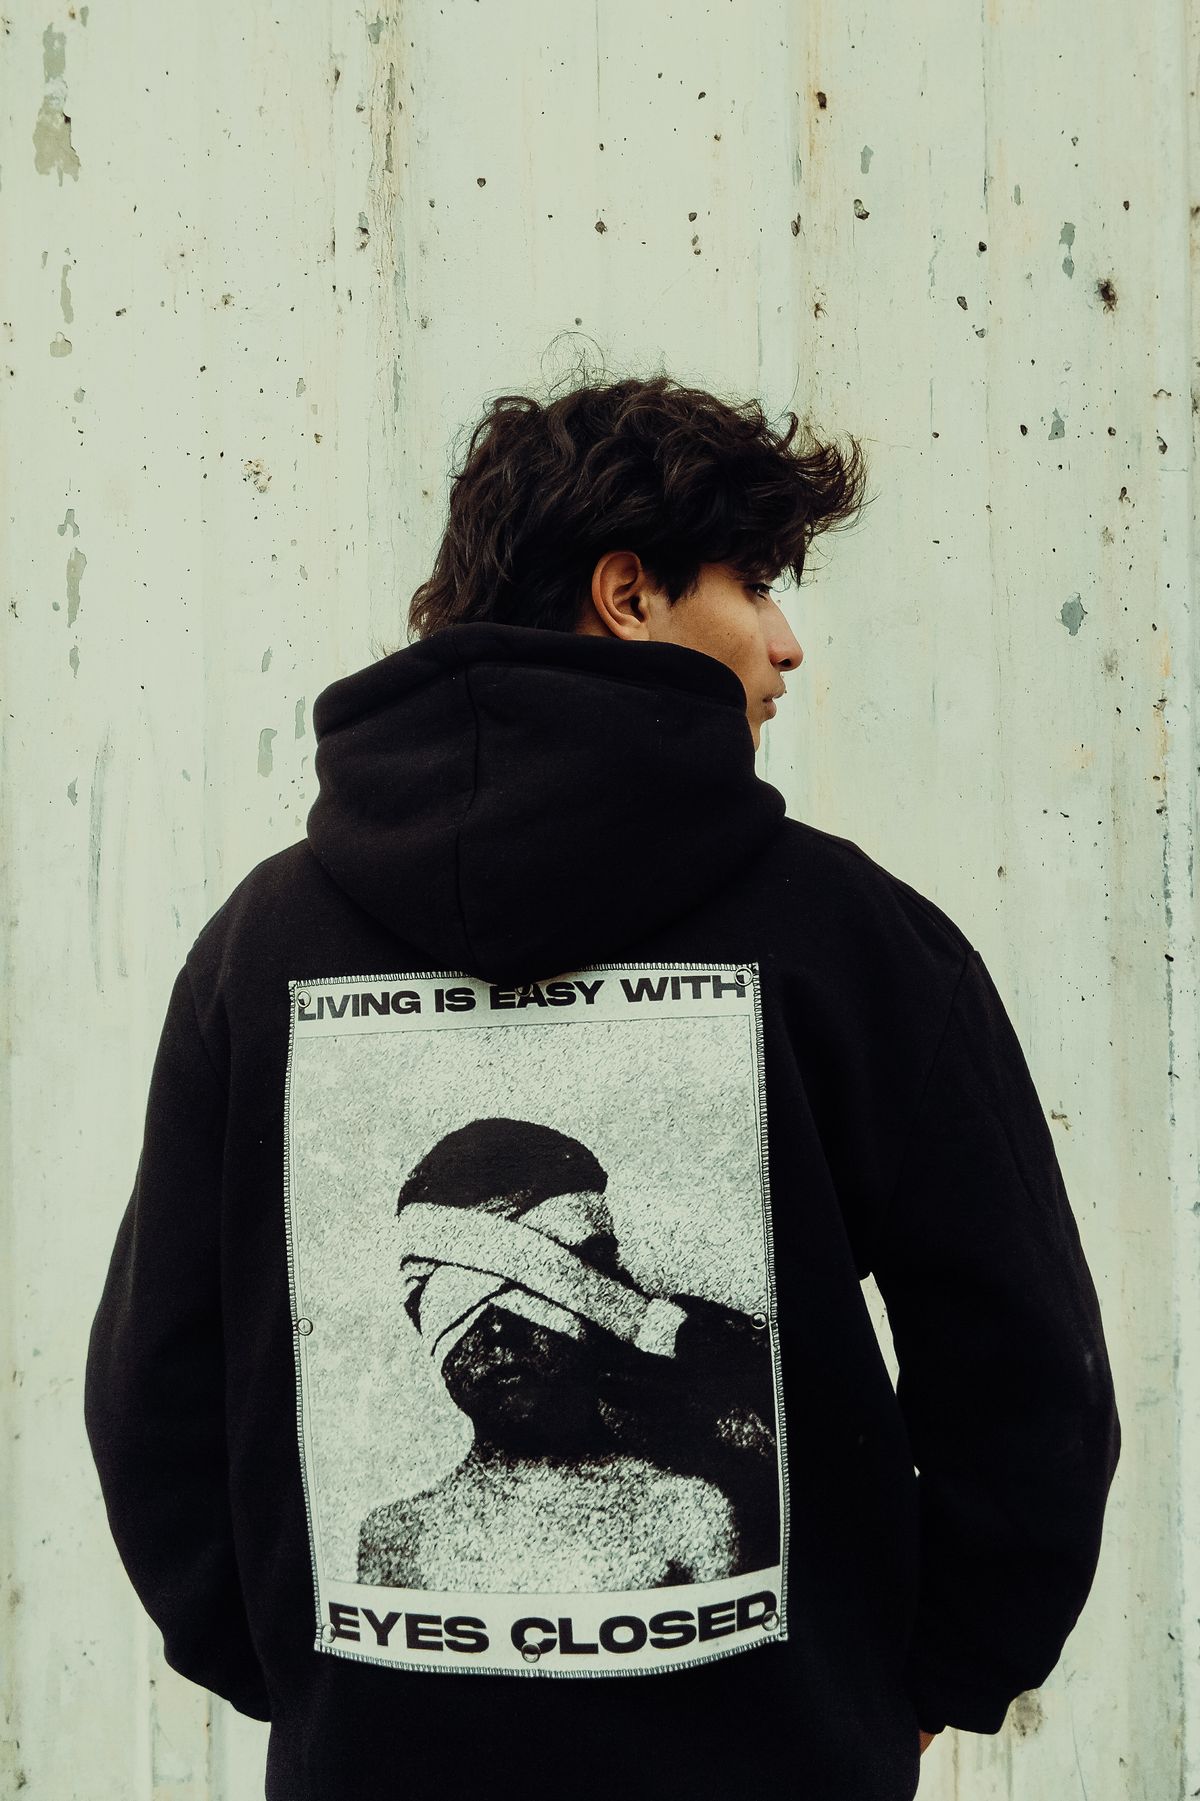
- Away from camera: Mysterious, editorial, shows the back of the fit. Good for back-print graphics and jacket details.
The Poses That Actually Work
The Lean
Lean against a wall, a pole, a car, anything vertical. The lean is the single most reliable streetwear photo pose because it solves multiple problems simultaneously: it gives your body a natural angle, it puts you in a real environment, and it creates a relaxed silhouette that lets the clothes drape naturally.
How to do it right: Shoulder or back against the surface, weight shifted to the hip closest to the wall, outside foot slightly forward. Don't lean with just your upper back — commit to the angle. One hand in a pocket, the other holding something or hanging naturally. Look off-camera.
The Walk
Mid-stride photos look dynamic and unstaged. The motion creates natural arm swing, weight shift, and fabric movement that static poses can't replicate.
How to do it right: Actually walk. Don't pose a walk — take real steps and have the photographer shoot continuously (burst mode). The best shot will be somewhere in the middle of a stride, with one foot forward and natural arm movement. This is the go-to for showing how baggy pants and loose silhouettes move.
The Crouch
Low angles add drama and emphasize sneakers. The crouch puts your shoes at eye level with the camera, making them the visual anchor of the photo.
How to do it right: One knee up, one knee down (or both up in a full squat). Rest your forearms on your knees. Look at the camera or off to the side. Make sure your top half is visible — the crouch should show the full fit from shoes to hat, not just your sneakers and knees.
The Corner
Standing at a building corner where two walls meet creates natural framing. The architecture adds visual interest and gives you something to interact with.
How to do it right: Stand at the corner's edge with your body angled 45 degrees. One hand can rest on the wall behind you. The corner creates leading lines that draw the viewer's eye to you. Works especially well for showing layered outfits against urban backgrounds.
The Sit
Sitting on steps, curbs, ledges, or benches creates a relaxed pose that shows your full outfit in a natural context. Seated poses are particularly good for showing shoe details and how pants break at the ankle.
How to do it right: Lean back slightly — sitting perfectly upright looks stiff. One foot flat, one foot extended or elevated. Arms on knees or one arm propping you up behind. This pose works on stairs, skatepark ledges, concrete barriers, and park benches.
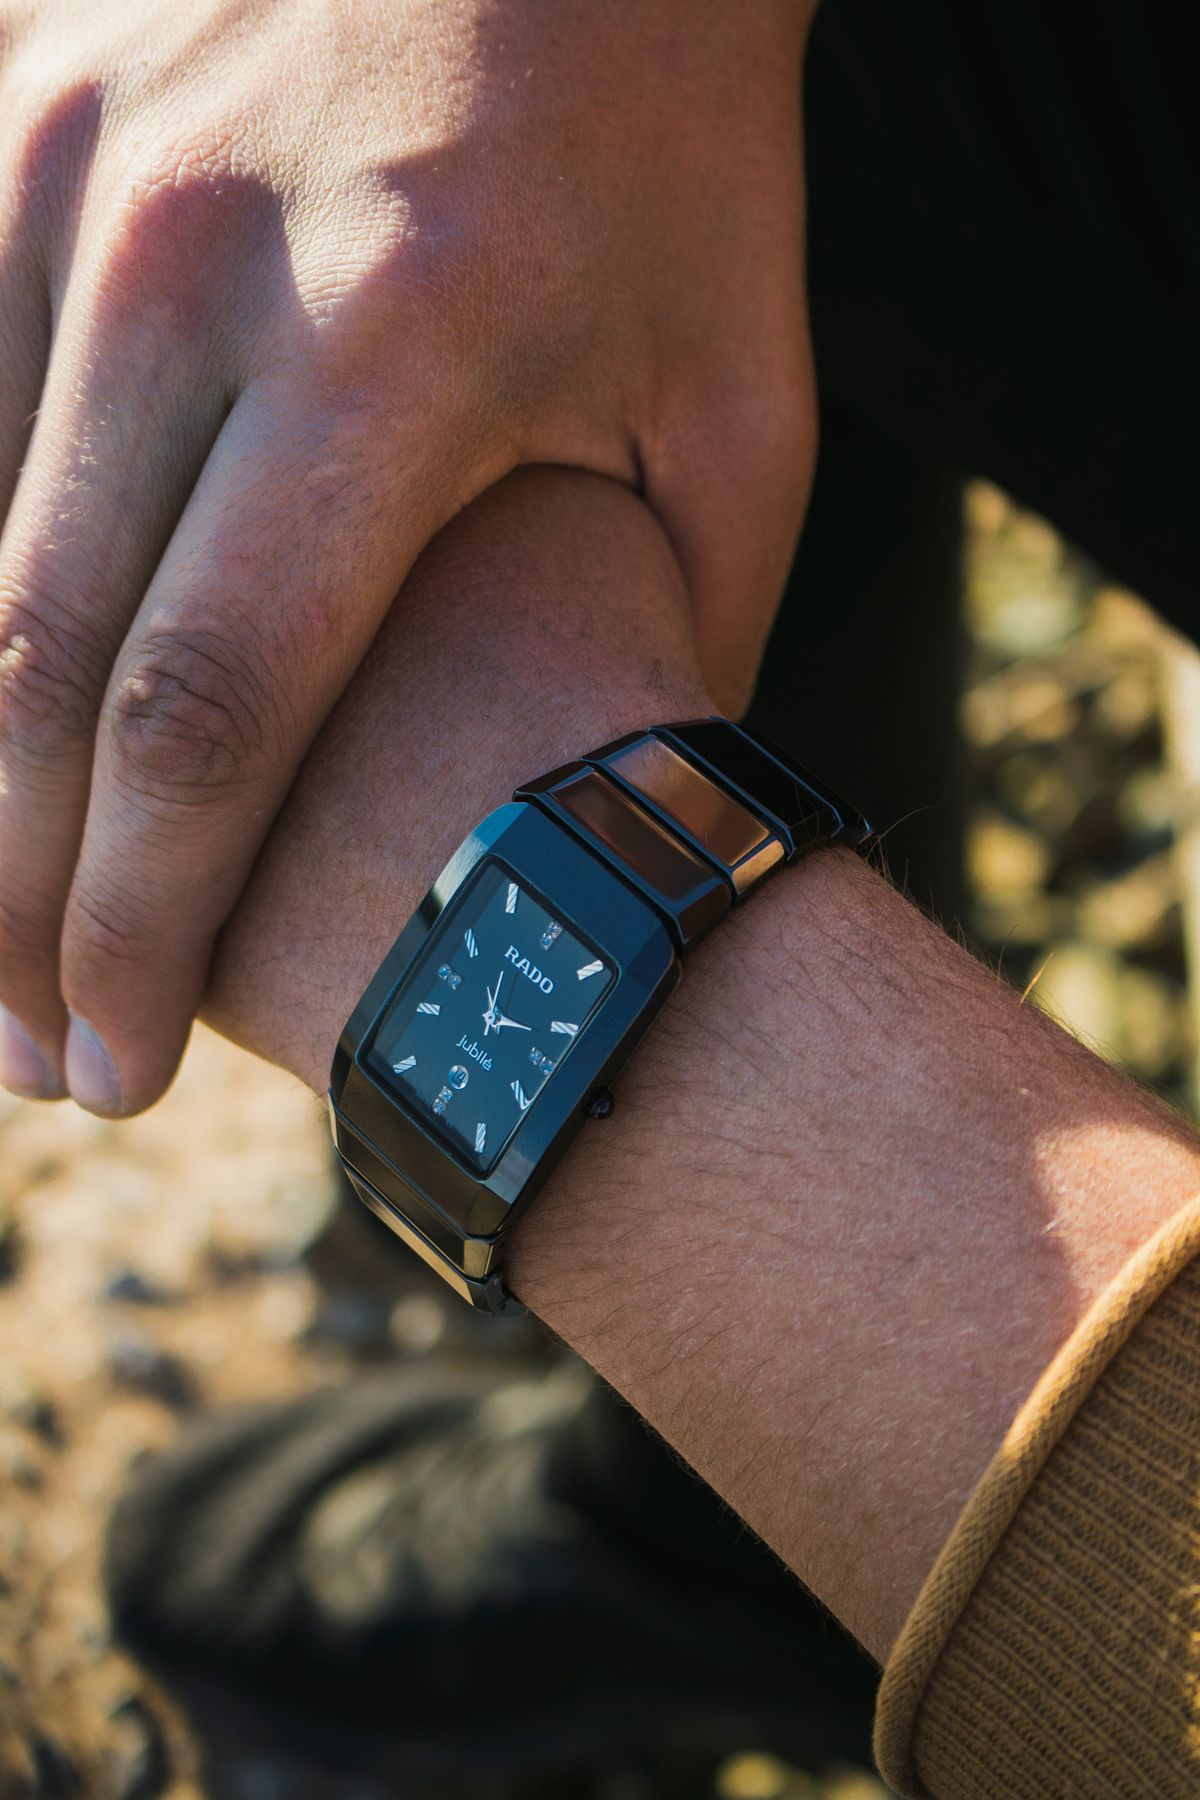
The Detail Shot
Not a full-body pose — a close-up of a specific detail. A wrist shot showing your watch and sleeve. A pocket shot showing the cargo detail. A collar shot showing the chain against the tee. These shots fill out a carousel post and show the intentionality of your fit.
How to do it right: Use portrait mode for background blur. Get close. Make sure the detail is in focus and the surrounding context (fabric, color) is visible. These shots don't require posing — they require attention to what makes your outfit interesting.
Location Matters
Urban Basics
Concrete walls, metal doors, brick facades, parking garages. These neutral backgrounds let the outfit be the focus. The texture adds interest without competing with your clothes. Most streetwear photos use some variation of "person standing near a visually interesting wall."
Natural Light vs. Shade
Direct sunlight creates harsh shadows that flatten your outfit and make colors look washed out. Open shade (under a building overhang, on the shaded side of a street) provides even, soft light that shows colors accurately and adds dimension to your silhouette.
The golden hour — 30 minutes before sunset — is the classic photography window for a reason. The warm, directional light adds depth and atmosphere that overhead sun can't match.
The Environment Match
Your location should feel consistent with your outfit. Technical gorpcore fits in urban environments work because of the contrast. But wearing a full techwear outfit in a pastoral park looks like you're lost. A tailored streetwear fit against industrial architecture creates interesting tension. The environment is part of the photo's story.
Phone Photography Tips
Camera Height
The camera's height relative to your body changes the entire photo.
- Eye level: Standard, neutral, how most people see you.
- Slightly below (waist height): Adds height, makes legs look longer, emphasizes sneakers. This is the most flattering angle for full-body streetwear photos.
- Ground level: Dramatic, emphasizes shoes heavily, creates a powerful silhouette. Use sparingly — it can look try-hard if overused.
- Above (overhead): Minimizes lower body, emphasizes top half. Useful for hat-focused or accessory-focused shots.
Timer and Burst Mode
If you're shooting alone, use a 10-second timer with burst mode enabled. This gives you time to get into position and captures multiple frames so you can choose the most natural-looking one. A phone tripod is a $15 investment that eliminates the "leaning phone against a shoe" approach.
Portrait Mode
Use it for waist-up shots where you want background separation. Don't use it for full-body shots — portrait mode's edge detection struggles with complex outlines (layered clothing, detailed sneakers) and often blurs parts of the outfit.
Editing
Minimal editing beats heavy editing every time. Adjust exposure, contrast, and maybe add a subtle color grade. Don't smooth your skin, don't warp proportions, don't add filters that change the color of your clothes. The goal is making your outfit look the way it does in real life, with slightly better lighting.
The Mindset Shift
The biggest improvement you can make has nothing to do with technique. It's accepting that looking good in photos requires practice. Nobody takes one photo and nails it. Professional photographers shoot hundreds of frames to get one usable image. Your hit rate will be lower, and that's fine.
Take more photos than you think you need. Review them critically but not cruelly. Identify what works — which angle, which expression, which hand position — and build on it. Over time, your "natural" pose becomes genuinely natural because you've practiced it enough.
The second mindset shift: you're photographing the outfit, not modeling for Vogue. Streetwear photography isn't about looking like a model. It's about showing the clothes in context on a real person in a real environment. Imperfections — wrinkled fabric, unposed moments, environmental chaos — often make better photos than perfectly staged shots.
The Social Media Consideration
If you're posting fit pics to Instagram, TikTok, or wherever you share your style, a few additional considerations:
Carousel format: Lead with your strongest full-body shot. Follow with detail shots and alternate angles. Close with an environmental or candid shot. This format lets people swipe through your full outfit story.
Consistency: Develop a consistent editing style and shooting approach. This builds a visual identity that's recognizable in feeds. You don't need professional equipment — consistency with a phone camera is more valuable than sporadic quality with expensive gear.
Variety: Alternate between poses and locations. If every photo is a wall lean, your feed gets monotonous. Rotate through the poses above and mix urban, natural, and indoor environments.
The Bottom Line
Good streetwear photography is available to anyone with a phone and a willingness to practice. The gap between "looks awkward" and "looks natural" closes quickly once you internalize the basics: shift your weight, give your hands purpose, look away from the camera, and choose locations that complement your outfit.
Your clothes deserve photos that do them justice. Put in the reps, find your angles, and stop accepting the first frame. The outfit did its job — now do yours behind (or in front of) the camera. Check our shop for pieces worth photographing.
RELATED READS
Best Heavyweight Hoodies for Streetwear in 2026 (400GSM+)
The definitive guide to 400GSM+ heavyweight hoodies — ranked by fabric weight, shrinkage, fit, and streetwear cred across every budget tier from $22 to $90.
G-Shock Watches for Streetwear: The 2026 Buying Guide
G-Shock is back as streetwear's essential wrist piece. The best models for 2026 — DW-5600, CasiOak, GD-100, solar, full metal — with styling and sizing notes.

The Only Sneaker Cleaning Guide You Will Ever Need
Stop ruining your sneakers with bad advice. This is the complete guide to cleaning, protecting, and storing every type of sneaker you own in 2026.